How you do unlock MadeToPrint Server on Windows.
Unlocking MadeToPrint requires administrator priviledges. As we are running as a Plug-In in InDesign Server, the InDesign Server – and thus the command line – needs administrator priviledges as well. Even if the user is an Administrator user, the command line needs to be run with administrator priviledges.

(1) Hit the Windows-"Start"-button.
(2) Search for "cmd".
(3) Right click on "cmd.exe".
(4) Left click on "Run as Administrator".
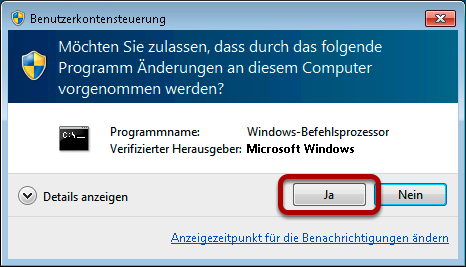
Click on "Yes" to allow the execution of the command line as an administrator.
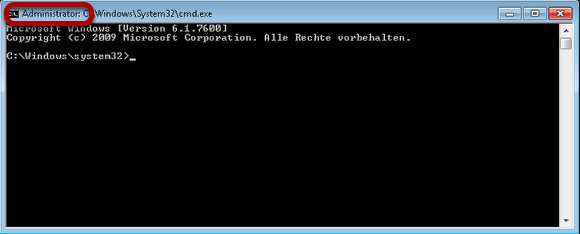
Please verify that the title of the command line starts with "Administrator". All entries that you make here will now be run with administrator privileges.
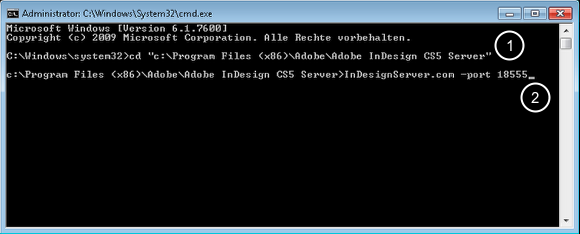
Start the InDesign Server .
(1) Change to the InDesign Server Directory.
(2) Select the InDesignServer.com file and specify a SOAP port through which you want to communicate with InDesign Server. This can be any free port number. Confirm with "Enter".
In this tutorial we use the port number 18555.

The InDesign Server is started. Make sure that these two lines appear. The first line states that SOAP requests will be handled at the port used when starting the Server.
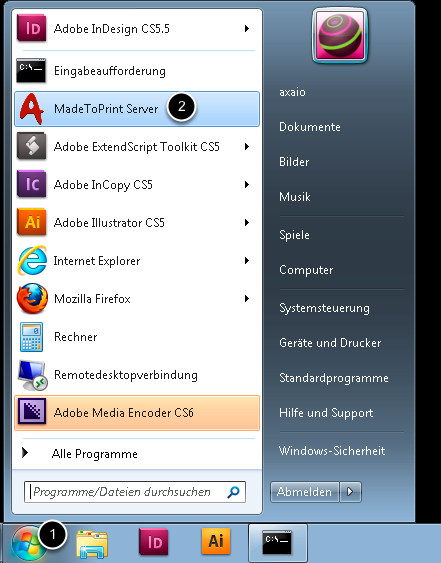
Open the MadeToPrint Server UI. You can do this the regular way from the Start menu or via the Windows Explorer.
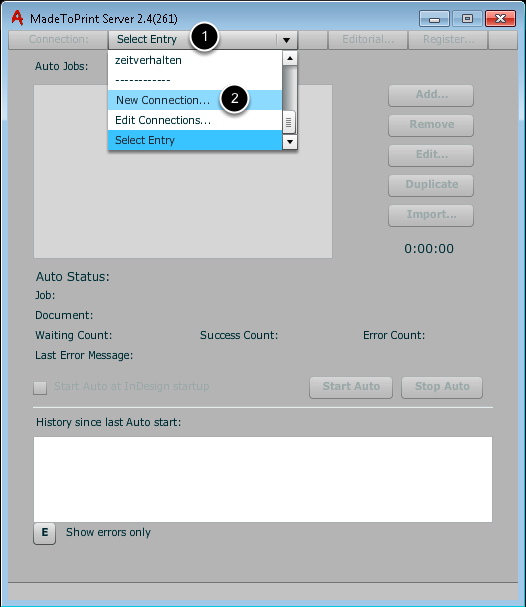
To enable the UI to communicate with the MadeToPrint InDesign plug-in server, you must create a connection in the UI.
(1) Click to "Select Entry".
(2) Select "New Connection ...".
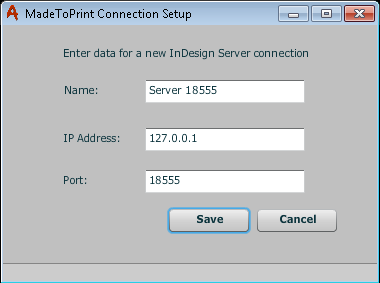
Now select the data to the InDesign server to which you want to "communicate". Enter the port number that you used at the start of InDesign server. If the InDesign Server runs on the same computer as the UI, then the IP address is 127.0.0.1 (you can also use "localhost"). Save the settings by clicking on "Save".
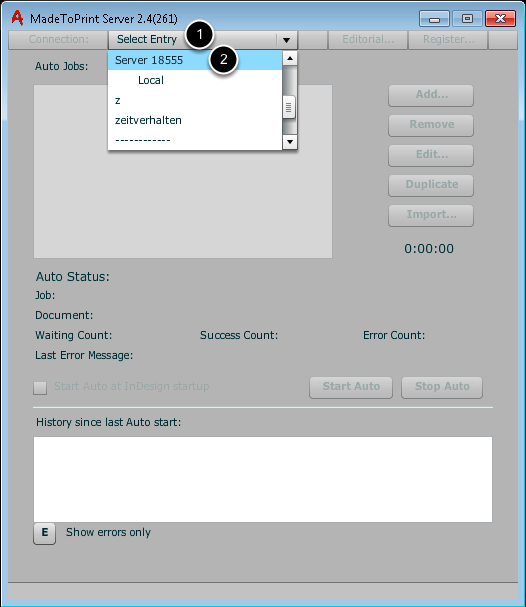
Now select the newly created connection.
(1) Click on "Select Entry".
(2) Select the name of the connection.

By clicking on "Register ..." the activation dialog opens.
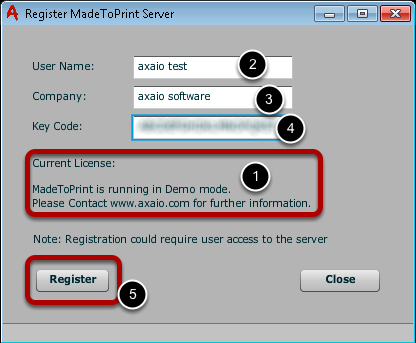
In the dialog, the current license is indicated (1). If you have previously made any registration, then the demo mode is mentioned.
Enter the name in this dialog (2) the company (3) and the key code (4) that you received by axaio software.
Then click on "Register" (5).
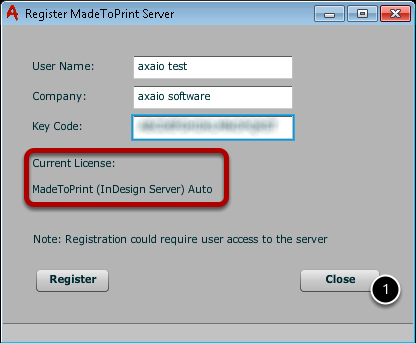
In the same dialog the current license updates.
Close the dialog by "Close" (1).
On the [x] In the main dialog, you can now finish the UI.

InDesign Server can and should be shut down (Ctrl + C) and restarted as normal user.
Did you like the video? Then you might want to have a look at related videos in the following playlist!